PYTHON ka DABBA
01 Jan 2017
. category:
Python
.
Comments
#open-source
#python
#technology
#learning
THE DABBA
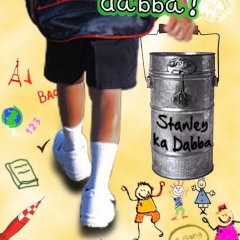
The dabba or the tiffin as called when it was introduced by the British, is so special to all of us. Going to school and waiting for those long hours in classrooms resisting the smell of your mother’s delicious handcooked sabji and ghee ke parathes waiting inside your dabba to be gulped by you and your friends (if apparently you are spared anything by them). As soon as the tiffin break bell rings, remember your friends jumping on you fighting for your dabba. Those were most rejoiced moments of our school days. The dabba was so special!
PYTHON AND DABBA??? WHAT THE HECK?
Now why I am talking about all this? I just wanted to remind you about how special your dabba was, to you and all your friends. So special is the dabba of python to all of us. The dabba of python or so called as its package contains all the delicious programs handcooked by your developer just waiting to be gulped by you and your needs, easing your life, making you happier. ![]()
So, this blog post is basically a cookery show where I’ll guide you inside the kitchen of a developer and show how he cooks your delicious programs and packs them into a powerful project that you run on your lappy.
NOW WHY PYTHON
Python is an easy to learn, powerful programming language. It has efficient high-level data structures and a simple but effective approach to object-oriented programming. Python’s elegant syntax and dynamic typing, together with its interpreted nature, make it an ideal language for scripting and rapid application development in many areas on most platforms.
If you do much work on computers, eventually you find that there’s some task you’d like to automate. For example, you may wish to perform a search-and-replace over a large number of text files, or rename and rearrange a bunch of photo files in a complicated way. Perhaps you’d like to write a small custom database, or a specialized GUI application, or a simple game.
YOUR OWN DABBA
Well, now we will set up a basic project directory. This is the basic skeleton directory which will have all the basics needed to get a new project up and running. It will have a project layout, automated tests, modules, and install scripts.
NB:- You must install pip, distribute, nose & virtualenv before you proceed further
First, create the structure of your skeleton directory with these commands:
$ mkdir -p python-projects
$ cd python-projects/
$ mkdir skeleton
$ cd skeleton
$ mkdir bin NAME tests docs
$ touch requirements.txt setup.py
$ touch NAME/release.py
$ touch tests/NAME_tests.py
Here python-projects is the parent directory of all the python projects that we’ll be working on. Inside python-projects directory we have our skeleton directory that is our basic python project directory. All the projects that you’ll ever work on have the same configuration and layout as our skeleton project. The directory NAME will be renamed to the main python package of skeleton project.
Next job is to setup some initial files:
$ touch NAME/__init__.py
$ touch tests/__init__.py
You must be wondering why this bro? Well let me clarify it now. Every python package must have an __init__.py file. Consider __init__.py file as the basic qualification of a python package.
Now put this code inside your NAME/release.py file. This file will be important later when you learn about version control and arguement passing method. Edit this as per the project and you are the owner of the project. That’s it!
"""Release file for NAME"""

name = 'NAME'
major = '0'
minor = '1'

__version__ = major + '.' + minor

__date__ = '2017-01-01'  ## YYYY-MM-DD

__description__ = 'Project description'

__author__ = 'author name'
__email__ = 'author email-id'

__url__= 'project url'
__download_url__ = 'url to download the project'
Now as you dive more into python programming you’ll see that certain projects need certain modules pre-installed before running requirements.txt contains list of those modules alongwith the version number if required. This can be installed using command given below.
$ pip install -r requirements.txt
Now onto the main sabji of our dabba, the setup.py file. Put the content given below inside your setup.py file.
#! /usr/bin/env python
# -*- coding: utf-8 -*-

import sys
try:
	from setuptools import setup
except ImportError:
	from distutils.core import setup

if sys.argv[-1] == 'setup.py':
    print('To install, run \'python setup.py install\'')
    print()

from NAME import release

if __name__ == "__main__":
    setup(
        name = release.name,
        version = release.__version__,
        author = release.__author__,
        author_email = release.__email__,
        description = release.__description__,
        url = release.__url__,
        download_url = release.__download_url__,
        keywords='NAME keywords',
        packages = ['NAME'],
        scripts = ['scripts location using /'],
        license = 'license name',
        entry_points = {
            'console_scripts': [
            'NAME_command = exe_program:main'
            ]
        },
        install_requires = ['nose'],
        test_suite = 'nose.collector',
        tests_require = ['']
    )
Finally the skeleton of the tests/NAME_tests.py.
import sys
from nose.tools import *
import NAME

# Your test unit. The name of this class is displayed in the test
# evaluation.
class YourTest(unittest.TestCase):
    def setUp(self):
        # Here you can set up your stuff. For example constant values,
        # initializations etc.
        pass

    def tearDown(self):
        # Here you clean up your stuff initialized in setUp(). For example
        # deleting arrays, call operating system API etc.
        pass

    def test_case1(self):
        # A test method. Put your test code here.
        pass
After this make sure you execute nosetests in your project root directory. The output must look like this.
$ nosetests
.
----------------------------------------------------------------------
Ran 1 test in 0.071s

OK
DONE ![]()
Now this is the basic structure of a python project. You can now modify this according to your own wish and start making your own projects and give yourself the tag of a developer!!! Well I already have and will show you how to do so…
MAKING MY FIRST PYTHON GAME ROOMZONED
(i) Made a copy of the skeleton directory. Named it
Roomzoned.
(ii) Renamed the NAME module to be the name of my project i.e. also Roomzoned (I just built a simple game. To keep it simple I named the project and the base package module same)
(iii) Renamed thetests/NAME_tests.pytotests/Roomzoned_tests.pyand theNAMEin the import statement toRoomzoned
(iv) Put my modules into the Roomzoned package.
(v) Put my script executableGame.pyfile inbindirectory
(vi) Edited the filessetup.py,release.py
You can find my Roomzoned game here or else can download it from here
Here goes your dabba into your bag…. ![]()

I am a graduate student from Indian Institute of Technology, Kharagpur with a major in Electronics and Electrical Communication Engineering. I have deep interest in application of Deep Learning and Blockchain technologies to solve real world problems. I am an active developer, working with three open-source organisations at the moment; namely Apertium, coala and gitmate.